Introduction
Integrating Sentry into a Node.js, Express.js, and MongoDB backend project significantly enhances error tracking and monitoring capabilities. This article outlines the steps to effectively implement Sentry, ensuring that developers can capture and respond to errors in real-time.
What is Sentry?
Sentry is an open-source error tracking tool that helps developers monitor and fix crashes in real-time. By integrating Sentry into your application, you can gain insights into errors, performance issues, and user interactions, allowing for proactive maintenance and improved user experience.
Setting Up Sentry
Create a Sentry Account
Begin by signing up for a Sentry account at Sentry.io. After creating an account, create a new project and select Node.js as the platform. This will provide you with a DSN (Data Source Name) that you’ll use to configure Sentry in your application.
Install Sentry SDK
In your Node.js project, install the Sentry SDK using npm:
npm install @sentry/node @sentry/profiling-node --saveConfigure Sentry in Your Application
To ensure Sentry is properly set up in your application, it’s crucial to initialize it as early as possible. Make sure to call Sentry.init before importing any other modules. If not, auto-instrumentation for those modules may not function correctly.
After initialization, the Sentry Node SDK will automatically capture unhandled exceptions and tracing data for your application.
To import and initialize Sentry, create a file named instrument.js and place your initialization code there.
instrument.js
const Sentry = require("@sentry/node");
const { nodeProfilingIntegration } = require("@sentry/profiling-node");

// Ensure to call this before requiring any other modules!
Sentry.init({
  dsn: "https://[email protected]/0",
  integrations: [
    // Add our Profiling integration
    nodeProfilingIntegration(),
  ],

  // Add Tracing by setting tracesSampleRate
  // We recommend adjusting this value in production
  tracesSampleRate: 1.0,

  // Set sampling rate for profiling
  // This is relative to tracesSampleRate
  profilesSampleRate: 1.0,
});
In your Express.js application, you need to initialize Sentry at the beginning of your application. Here’s how to do it. You’ll need to require or import the instrument.js file before requiring any other modules in your application
// Require this first!
require("./instrument");

// Now require other modules
const express = require("express");
const Sentry = require("@sentry/node");

const app = express();

// Add your routes, etc.

// Add this after all routes,
// but before any and other error-handling middlewares are defined
Sentry.setupExpressErrorHandler(app);

app.listen(3000);
Verify Sentry Setup

This code snippet contains an intentional error, allowing you to verify that everything is functioning correctly as soon as you complete the setup.
app.get("/debug-sentry", function mainHandler(req, res) {
  throw new Error("My first Sentry error!");
});
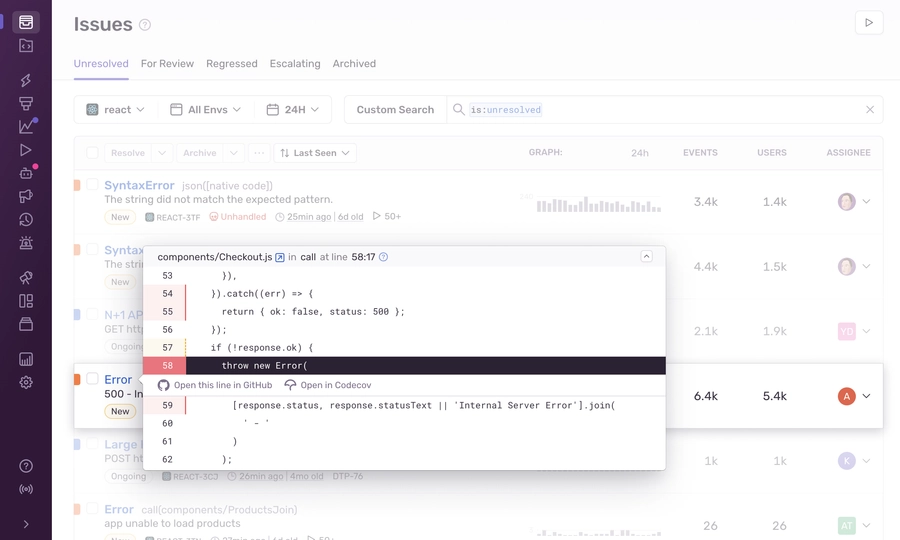
To view and address the recorded error, log in to sentry.io and open your project. Click on the error’s title to access a page with detailed information, where you can also mark the error as resolved.
Related Articles
Simplify Your Code With These Async/Await Best Practices In JavaScript
Difference Between Promise.All() And Promise.AllSettled()
Laravel Interview Questions And Answers
Frequently Asked Questions
How do I integrate Sentry with my application?
To integrate Sentry, install the Sentry SDK for your platform, then initialize it in your application’s entry point by calling Sentry.init() with your DSN (Data Source Name) and configuration options.
What types of errors does Sentry capture?
Sentry captures unhandled exceptions, promise rejections, and custom errors you manually report. It can also capture performance data like transaction traces.
How do I resolve errors in Sentry?
To resolve errors, log in to your Sentry dashboard, find the error in your project, and mark it as resolved. Sentry will track whether the error reoccurs after being marked as resolved.
Conclusion
Integrating Sentry into your Node.js, Express.js, and MongoDB application is a straightforward process that significantly improves error tracking and monitoring. By following the steps outlined above, you can ensure that your application is robust and that you are aware of any issues as they arise, allowing for timely fixes and enhanced user experience.


